Wooden bookshelf shaped like a house


A wooden bookshelf shaped like a house is a creative and practical way to store books while adding a cozy and decorative touch to any room. Designed with a roof-like top and multiple shelves resembling rooms, this bookshelf is perfect for children's bedrooms, living rooms, or reading corners.

Why Make a Wooden Bookshelf Shaped Like a House?

This project combines functionality with artistic design. It’s a great way to organize books while creating a playful and inviting atmosphere. The house shape can be customized in different styles, from a simple modern house to a detailed cottage or barn design.

General Steps to Build a Wooden Bookshelf Shaped Like a House

  1. Choose Your Wood – Use sturdy wood like plywood, MDF, or solid pine for durability.
  2. Design the Bookshelf – Plan the height, width, and number of shelves to resemble a house structure.
  3. Cut the Wood Panels – Cut the back panel, sidewalls, shelves, and roof-shaped top.
  4. Assemble the Frame – Attach the sides, base, and roof pieces securely.
  5. Install the Shelves – Divide the interior into sections resembling rooms or compartments.
  6. Smooth and Finish – Sand the edges and apply paint, stain, or a natural finish.
  7. Add Decorative Details – Paint windows, doors, or a chimney to enhance the house-like appearance.

Creative Ideas for a Wooden Bookshelf Shaped Like a House

  • Minimalist House Shelf – A simple open-shelf design with a slanted roof.
  • Cottage-Style Bookshelf – A rustic design with painted details like windows and shutters.
  • Multi-Compartment "Rooms" – Shelves divided into small "rooms" for books, toys, or decor.
  • Wall-Mounted House Shelf – A smaller, floating version for wall display.
  • Dollhouse + Bookshelf Combo – A dual-purpose design where kids can use it as a bookshelf and a playhouse.

A wooden bookshelf shaped like a house is a fun and functional woodworking project that adds character to any space. Whether made for kids or as a stylish home decor piece, it’s a great way to showcase creativity and craftsmanship!

15 One-Board Wood Project Ideas

Woodworking doesn’t always require a large amount of material. With just a single board, you can create beautiful, functional, and decorative pieces. Whether you’re a beginner or an experienced woodworker looking for a quick project, these 15 one-board wood project ideas offer inspiration for making the most out of a single piece of wood.

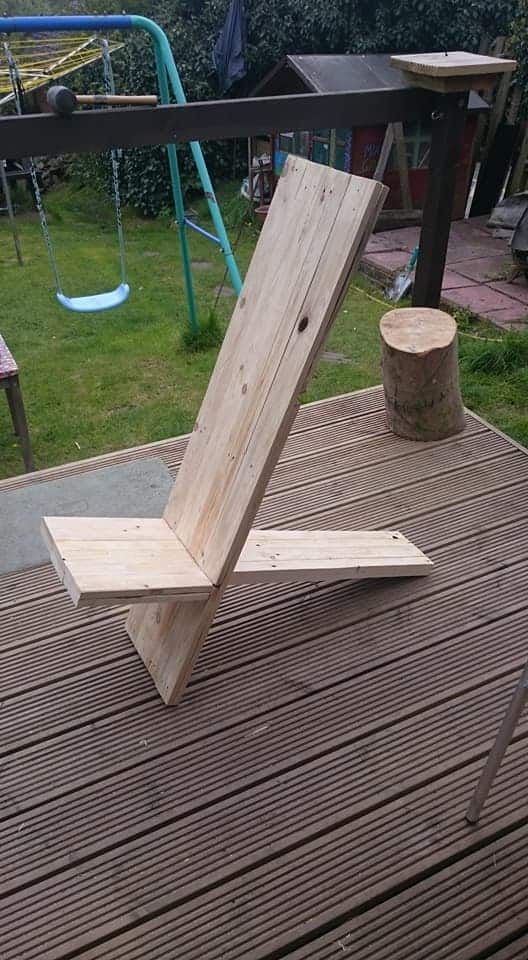
1. One-Board Chair


A simple yet sturdy chair made from a single board. This design usually features interlocking pieces or a folding mechanism to maximize stability while keeping the material usage minimal.

2. One-Board Stool


A compact and functional stool that can serve as a seat, footrest, or small side table. A clever design with angled legs and proper cuts can ensure strength and durability.

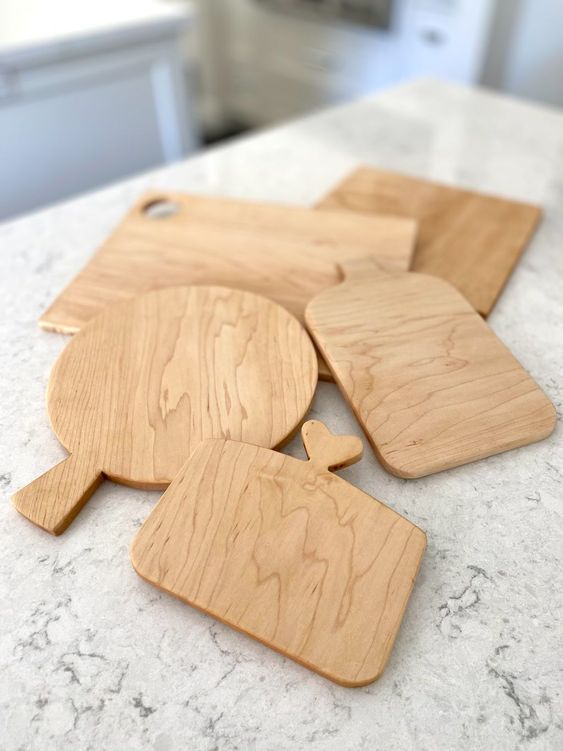
3. One-Board Cutting Board


One of the easiest and most useful woodworking projects! A cutting board can be made in various shapes, with smooth edges and a food-safe finish. You can also add a handle for convenience.

4. One-Board Personalized Gift


Create a heartfelt gift by carving or engraving names, quotes, or images onto a wooden plaque. This can be a sign, a photo holder, or a small decorative piece for someone special.

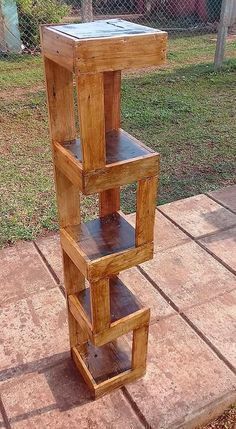
5. One-Board Stand Shelf


A simple, freestanding shelf that can hold books, small plants, or decor. With a few precise cuts and careful sanding, a single board can become a stylish vertical or angled stand shelf.

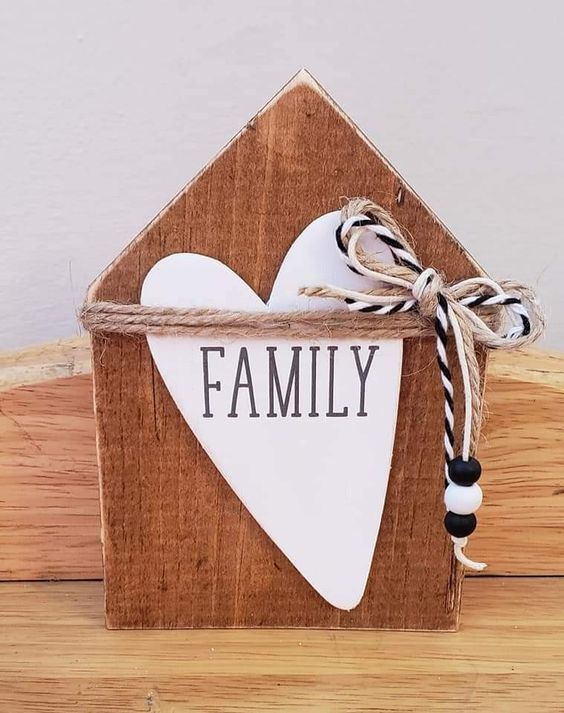
6. One-Board Home Sign


Personalize your home’s entrance with a beautifully crafted wooden sign. Stain or paint it with your family name, a welcoming quote, or even a carved design.

7. One-Board Coat Rack


A one-board coat rack with hooks or carved notches for hanging coats, hats, or bags is a practical and stylish addition to any entryway.

8. One-Board Ladder Shelf


With creative cutting and assembly, a single board can be turned into a small leaning ladder shelf. This design works well for displaying plants, books, or decorative items.

9. One-Board Wood Lamp


A sleek wooden lamp frame with a simple cutout for a light fixture can add warmth to any space. The design can range from minimalistic to sculptural.

10. One-Board Toilet Paper Holder


A functional and space-saving holder for toilet paper rolls. A simple, well-designed slot and a smooth finish make it both practical and stylish.

11. One-Board Bath Caddy


A one-board bath tray that rests over the edges of a bathtub. Add a slot for a book, candle holder, or a cup holder to enhance relaxation.

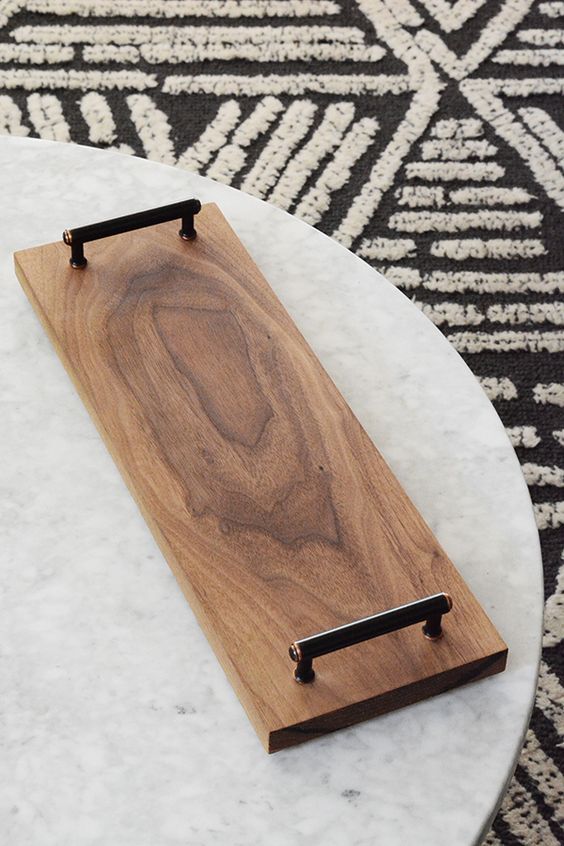
12. One-Board Tray


A serving tray with cut-out handles or raised edges is a simple but elegant project. Great for serving breakfast in bed or organizing small items on a table.

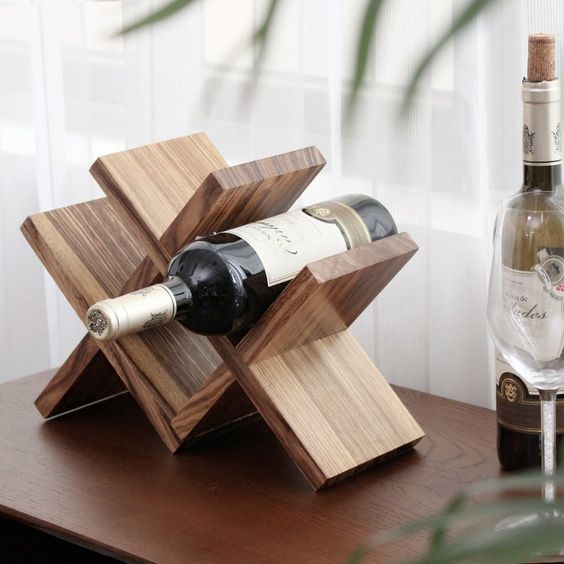
13. One-Board Wine Rack


A simple wine rack design can hold a few bottles with angled slots or drilled holes. This compact project is ideal for kitchens or dining areas.

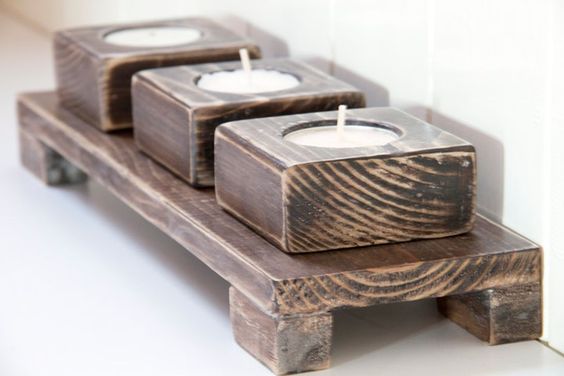
14. One-Board Candle Holder


Drill evenly spaced holes or carve slots to hold tea lights or candles. A rustic or modern candle holder can be a great centerpiece for any space.

15. One-Board Wood Wall Decor

A single board can be turned into a beautiful wall decoration. Whether carved, painted, or left natural, it can be shaped into geometric patterns, abstract art, or rustic home decor.

Conclusion

These one-board wood projects prove that creativity and efficiency go hand in hand. Whether you need a functional piece of furniture, a decorative accent, or a thoughtful gift, a single board is all you need to get started. With simple tools and techniques, you can turn a basic piece of wood into something truly special!

Wooden artistic representation of two light bulbs


A wooden artistic representation of two light bulbs is a unique and eye-catching project that blends creativity with craftsmanship. Whether designed as a sculpture, wall art, or functional lighting piece, this concept symbolizes ideas, innovation, and illumination. It’s perfect for home decor, offices, or creative workspaces.

Why Make a Wooden Artistic Representation of Two Light Bulbs?

This project is ideal for artists, woodworkers, and design enthusiasts who want to craft a symbolic and visually striking piece. The dual-lightbulb design can represent collaboration, dual ideas, or even contrasting themes like old and new, bright and dim, or classic and modern.

General Steps to Build a Wooden Artistic Representation of Two Light Bulbs

  1. Choose Your Wood – Select a fine-grain wood like maple, walnut, or birch for smooth carving and finishing.
  2. Sketch the Design – Decide on the artistic style—realistic, abstract, geometric, or minimalist.
  3. Cut and Shape the Bulbs – Use woodworking tools to carve or assemble the bulb shapes.
  4. Create the Filament Detail – Carve delicate filament lines, use metal wire, or engrave patterns for a realistic touch.
  5. Design the Base or Mounting – Decide if it will be a freestanding sculpture, wall-mounted piece, or part of a functional lamp.
  6. Smooth and Finish – Sand the entire piece and apply a wood stain, oil, or natural finish to highlight the details.
  7. Optional Lighting Feature – Integrate actual LED lights or Edison-style bulbs to bring the design to life.

Creative Ideas for a Wooden Artistic Representation of Two Light Bulbs

  • Intertwined Light Bulbs – Two bulbs connected by a wooden filament for a symbolic and artistic touch.
  • Old vs. New Style – One bulb in a vintage Edison style and the other in a modern LED shape.
  • Geometric Abstract Design – A minimalist, angular interpretation of two bulbs.
  • Wall Hanging Piece – A carved wooden relief of two light bulbs for a decorative wall art installation.
  • Functional Lamp – A wooden frame shaped like two bulbs with actual lights embedded inside.

A wooden artistic representation of two light bulbs is a thought-provoking and visually engaging project. Whether used as a sculpture, lighting fixture, or symbolic artwork, it’s a great way to showcase creativity and woodworking skills!

Wooden Lamp in the Shape of a Dog

A wooden lamp in the shape of a dog is a fun and creative lighting piece that combines functionality with decorative charm. Whether designed as a table lamp, floor lamp, or nightlight, this project brings warmth and personality to any room. It's perfect for dog lovers, kids' rooms, or anyone looking for a unique handcrafted lighting solution.

Why Make a Wooden Dog Lamp?

This project is a great way to experiment with woodworking and lighting design. The playful dog shape makes it appealing for children and pet enthusiasts, while the wooden construction adds a natural and cozy feel. Additionally, the lamp can be customized with different dog breeds, poses, and finishes to match any decor.

General Steps to Build a Wooden Dog Lamp

  1. Choose Your Wood – Use lightweight yet sturdy wood like pine or plywood for easy shaping.
  2. Design the Dog Shape – Sketch a side profile or create a 3D structure resembling a dog.
  3. Cut and Assemble the Parts – Cut out the body, legs, head, and tail, then join them securely.
  4. Plan the Lighting Placement – Decide where to install the bulb (e.g., as the dog’s head or attached to its back).
  5. Install the Light Fixture – Use an LED bulb or Edison-style lamp with a safe wiring setup.
  6. Smooth and Finish – Sand the edges and apply paint, stain, or a natural wood finish.
  7. Final Details – Add movable joints, carved features, or even a dog collar for extra personality.

Creative Ideas for a Wooden Dog Lamp

  • Adjustable Dog Lamp – A poseable design with flexible legs and head for directing light.
  • Bulb as Dog’s Head – The lamp fixture replaces the head for a modern and quirky look.
  • Cartoon Dog Shape – A simple, playful silhouette for a fun and child-friendly design.
  • Realistic Dog Sculpture – A more detailed, hand-carved dog form for an artistic touch.
  • Minimalist Geometric Dog – A sleek, angular design that blends with modern interiors.

A wooden dog lamp is a fun and engaging project that adds warmth and character to any space. Whether designed for practical use or as a decorative piece, it’s a creative woodworking idea that brings light and joy!

Wooden Table with an American Flag Design


A wooden table with an American flag design is a bold and creative way to showcase patriotism while adding a unique touch to home decor. Whether used as a coffee table, dining table, or side table, this design blends rustic charm with a symbol of national pride.

Why Make a Wooden Table with an American Flag Design?

This project is perfect for those who love woodworking and want to create a meaningful and visually striking piece. The combination of different wood stains, painted elements, or even carved details makes it a fun and customizable build. It’s ideal for patriotic home decor, man caves, outdoor spaces, or as a conversation piece in a living area.

General Steps to Build a Wooden Table with an American Flag Design

  1. Choose Your Wood – Use durable hardwoods like oak, maple, or pine for a strong and rustic look.
  2. Design the Flag Layout – Decide whether to paint, stain, or carve the stars and stripes into the tabletop.
  3. Assemble the Tabletop – Create a flat, sturdy surface by joining wood planks or using a single slab.
  4. Apply the Flag Design
    • Paint or Stain – Use red, white, and blue paint or natural wood stains for a vintage look.
    • Carve or Engrave – Hand-carve stars and stripes for a detailed textured effect.
    • Burned Wood Effect – Use a torch to create a rustic, weathered flag look.
  5. Build and Attach the Legs – Choose a base style, such as sturdy wooden legs, a trestle base, or metal legs for an industrial touch.
  6. Seal and Finish – Apply a protective finish to enhance durability and protect the flag design.

Creative Ideas for a Wooden Table with an American Flag Design

  • Rustic Burnt-Wood Flag – Torch the wood for a distressed, vintage flag look.
  • Split-Flag Design – Have half the table display the flag, while the other half remains a natural wood finish.
  • Inlay Star Pattern – Use laser-cut wood or metal stars for added dimension.
  • Resin Infused Flag – Fill carved sections with colored epoxy resin for a smooth, modern touch.
  • Folding or Expandable Table – A flag design that extends when the table is opened.

A wooden table with an American flag design is a striking and meaningful furniture piece that blends craftsmanship with patriotism. Whether made for a home, office, or outdoor setting, it’s a unique project that proudly displays American spirit!

A wooden side table with a checkered top


A wooden side table with a checkered top is a stunning blend of craftsmanship and design. Featuring a patterned tabletop made of alternating wood tones, this table adds a touch of sophistication to any space. Whether placed in a living room, bedroom, or office, it serves as both a functional piece and a statement of style.

Why Make a Wooden Side Table with a Checkered Top?

This project is perfect for those who love woodworking and want to create a visually striking piece of furniture. The checkered pattern allows for creative use of different wood types, adding contrast and texture. Plus, it’s a great way to experiment with inlay techniques and precision woodworking.

General Steps to Build a Wooden Side Table with a Checkered Top

  1. Choose Your Wood – Select two contrasting wood types (e.g., walnut and maple) for the checkered effect.
  2. Cut the Checkered Pieces – Cut square pieces of each wood type to uniform size.
  3. Assemble the Tabletop – Arrange the squares in an alternating pattern and glue them together.
  4. Trim and Sand – Cut the tabletop to the desired shape (square, round, or rectangular) and smooth the surface.
  5. Build the Table Base – Construct and attach sturdy legs, choosing a design that complements the top.
  6. Apply Finish – Use a clear coat, stain, or oil to enhance the wood grain and protect the surface.
  7. Final Touches – Add edge detailing or a slight bevel for a refined look.

Creative Ideas for a Wooden Side Table with a Checkered Top

  • Classic Two-Tone Checkered Pattern – A simple black-and-white effect using dark and light woods.
  • Diagonal Checkered Design – Rotating the pattern at a 45-degree angle for a dynamic look.
  • Round Checkered Table – A circular top with a checkered pattern for a softer aesthetic.
  • Chessboard-Inspired Table – Incorporate chess piece storage for a multifunctional design.
  • Mixed Materials – Combine wood with epoxy resin or metal for a modern twist.

A wooden side table with a checkered top is a great way to showcase woodworking skills while creating a unique and stylish furniture piece. Whether kept minimal or enhanced with decorative details, this table is sure to impress!

Wooden table with storage space


 A wooden table with storage space is a versatile and functional addition to any home or workspace. Combining a sturdy tabletop with built-in storage, this design helps keep essentials organized while maintaining a clean and stylish appearance. Whether used in a living room, office, or bedroom, this table is perfect for maximizing space.

Why Make a Wooden Table with Storage Space?

This project is ideal for those who want both aesthetics and functionality. The built-in storage helps reduce clutter, making it a great choice for small spaces. Additionally, the design can be customized to fit different styles, from modern minimalism to rustic charm.

General Steps to Build a Wooden Table with Storage Space

  1. Choose Your Wood – Use durable wood like oak, pine, or plywood for strength and longevity.
  2. Design the Table – Decide on the table shape, size, and type of storage (drawers, shelves, or hidden compartments).
  3. Cut and Assemble the Frame – Build the tabletop and legs, ensuring stability.
  4. Create the Storage Sections – Add drawers, cubbies, or lift-top compartments.
  5. Smooth and Finish – Sand the wood and apply stain, paint, or varnish for protection.
  6. Install Hardware – Attach handles, hinges, or sliders for ease of use.
  7. Final Touches – Add decorative elements or dividers for better organization.

Creative Ideas for a Wooden Table with Storage Space

  • Lift-Top Coffee Table – A hidden storage compartment under a lift-up tabletop.
  • Drawer and Shelf Combo – A mix of open shelves and drawers for flexible storage.
  • Rustic Wooden Crate Table – A farmhouse-style table made with repurposed wood crates.
  • Compact Office Desk – A sleek design with built-in file organizers and pen holders.
  • Hidden Storage Table – A modern design with a secret compartment for valuables.

A wooden table with storage space is a practical and stylish project that enhances both functionality and decor. Whether you need a workspace, coffee table, or bedside table, this design offers endless possibilities!

Wooden Wall Clock with three distinct section


A wooden wall clock with three distinct sections is a unique and eye-catching decor piece that combines functionality with artistic design. The three sections can feature different wood tones, textures, or even additional elements like numbers, engravings, or patterns, making it a perfect centerpiece for any home or office.

Why Make a Wooden Wall Clock with Three Sections?

This project is a great way to experiment with wood combinations and clock-making techniques. The divided sections allow for creative customization, such as contrasting wood grains, geometric designs, or even mixed materials like metal and resin. It’s a stylish way to keep track of time while showcasing woodworking craftsmanship.

General Steps to Build a Wooden Wall Clock with Three Sections

  1. Choose Your Wood – Use different types of wood (e.g., walnut, oak, pine) for contrast.
  2. Design the Clock Layout – Decide how to divide the three sections (vertical, diagonal, curved, etc.).
  3. Cut and Assemble the Sections – Cut each section separately and join them securely with wood glue or dowels.
  4. Drill the Center Hole – Make a hole for the clock mechanism.
  5. Install the Clock Hands & Mechanism – Attach a battery-operated clock movement kit.
  6. Smooth and Finish – Sand the surface and apply varnish, stain, or paint for a polished look.
  7. Add Final Details – Incorporate numbers, engraved patterns, or metallic inlays for extra style.

Creative Ideas for a Wooden Wall Clock with Three Sections

  • Natural vs. Stained Wood – One section left natural, one dark-stained, and one painted for contrast.
  • Geometric Division – Sections cut in a triangle or hexagon pattern for a modern touch.
  • Resin Inlay Section – One section filled with colorful or transparent resin for a striking effect.
  • Minimalist Engraving – Subtle engraved hour markers for a sleek design.
  • Mixed Material Look – Combine wood with metal or acrylic for an industrial aesthetic.

A wooden wall clock with three distinct sections is a fun and artistic project that enhances any interior space. Whether you prefer a classic, rustic, or contemporary style, this clock allows endless design possibilities!